MIDI Communication
MIDI, or Musical Instrument Digital Interface, is a specification for a communications protocol between digital synthesizers and other digital music devices. It was developed to be as simple and general as possible, to give synthesizer manufacturers as much flexibility as possible, yet still have their instruments talk to each other without communication problems.
MIDI does not define the nature or timbre of a synthesized sound. It merely describes the action of playing the sounds. In a sense, MIDI is a markup language for synthesizers. MIDI is to digital synthesizers what HTML is to the web.
As a communications and control language for musical instruments, it’s imperative that MIDI be fast. It wouldn’t do to have a key pressed on a synthesizer keyboard only to hear the note several seconds later. Because it’s fast, it’s a useful protocol to use for other interactive devices as well. Its speed give the appearance of instantaneous response to a user’s action.
Although MIDI is at its core a simple protocol to grasp, there are many facets to it. It’s very powerful for that reason. This page is just enough to give you a glimpse of what MIDI can do. There are lots of good sources of information on MIDI on the web and elsewhere. For these notes, I found Paul Lehrman and Tim Tully’s book MIDI For The Professional (©1993 Amsco Publications, US ISBN 0.8256.1374.2) invaluable sources.
MIDI is a serial communications protocol, operating at 31,250 bits per second. Each byte has 8 bits, plus a start bit and a stop bit. It operates at 5 volts DC. The standard MIDI connector is a 5-pin DIN connector, and usually all connectors on the device are female, and both ends of a MIDI cable are male. There is a specific wiring schematic for MIDI input and outputs, as follows:

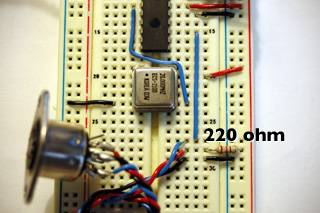
The hardware required for this: 2 5-pin DIN female jacks, 3 220-ohm resistors, 1 270-ohm resistor, 1 10-kohm resistor, 1 IN914 diode, 1 2N2222 NPN transistor, 1 6N138 optoisolator, 1 7404 Hex inverter.
Note: the hex Inverter may not be necessary if your serial device (Stamp, BX-24, etc) has already done the inversion. For the PIC, the inverter is necessary. For the BX-24, it’s not, and you can use the following output circuit:

Schematic:

Any MIDI command consists of at least two bytes, a status byte and a data byte. The most common MIDI messages have three bytes, a status byte followed by two data bytes, as we’ll see later. MIDI values are usually expressed in hexadecimal notation, for ease of reference. All status bytes have a value of 128 or greater. If you think of this in binary terms, it means the first bit of a status byte is always 1. This makes it easy for the synth to determine what information it’s getting, right from the first bit of a message. Similarly, all data bytes have a value of 127 or less, so their first bit would be 0. This means that each MIDI byte has a range of 128 values, 0-127 for data bytes, and 128-255 for status bytes.
In a typical MIDI message, three pieces of information will be sent: the action (note on, note off, pitch bend, etc.), the pitch (plain old musical pitch) and the velocity (basically, how loud you want the sound to play). A typical MIDI message might be something like this (in hexadecimal notation):
9A 45 45
This message says “play A above middle C on the tenth MIDI channel, medium volume.”
The first half of a status byte gives the command, and the second gives the channel. So in the command above, whatever receiver was set to respond to the tenth channel would start to play a note, pitched at A above middle C, at a medium volume (69 on a scale of 0-127).
Here are some of the available commands, those that the status byte would specify:
Image from Mark Coniglio’s MIDI Geek page, another excellent MIDI source.
| Value (decimal) | Value (Hex) | Command | Data bytes |
| 128-143 | 80-8F | Note off | 2 (note, velocity) |
| 144-159 | 90-9F | Note on | 2 (note, velocity) |
| 160-175 | A0-AF | Key Pressure | 2 (note, key pressure) |
| 176-191 | B0-BF | Control Change | 2 (controller no., value) |
| 192-207 | C0-CF | Program Change | 1 (program no.) |
| 208-223 | D0-DF | Channel Pressure | 1 (pressure) |
| 224-239 | E0-EF | Pitch Bend | 2 (least significant byte, most significant byte) |
Noteon tells the synthesizer to start playing a note at a specified pitch and velocity; noteoff tells it to stop playing a note at a specific pitch and velocity. Whenever you send a noteon, you should send a noteoff when you want it to stop. You could also send a noteon with a velocity of 0, which has the same effect as a noteoff (it stops the sound). These two are the most common MIDI messages, and likely the only ones you’ll use form the BASIC stamp most of the time.Key pressure is the pressure on a key that’s being pressed; it would affect things like the vibrato, etc. on a note that’s already playing. Channel pressure is similar to key pressure, but applies to all notes on a given channel.
Pitch bend changes the pitch of a note that’s already playing; It’s got a 2-byte precision, so the range of pitch bend is 16,383 (128×128 – 1; remember, MIDI data bytes have a range of 0-127, not 0-255.). Pitch bend is usually generated by a wheel or joystick, with no bend in the middle of the wheel. So 0 represents maximum bend down, and 16,393 represents maximum bend up.
Control changes are changes to specific controllers, changes that can happen to a note in progress; controllers can do things like change the volume (not velocity), add sustain to a note, etc. Controllers might also select a different bank of sounds, to change the sound that’s playing. For a complete list of controller messages, see Lehrman & Tully’s MIDI For The Professional.
One useful controller is 7B in hexadecimal, which sends an “all notes off” message on a designated channel. It’s useful for when you’ve got notes that you can’t stop playing and can’t figure out why. For example, to stop all notes on channel one, you’d send B0 7B. No second data byte is necessary.
MIDI and the Microcontroller
Once you’ve got your microcontroller wired as above, sending MIDI out is easy. Generally, since microcontrollers we’re using aren’t fast enough to do synthesis, you’ll have little reason to take MIDI into it, so you may not need the MIDI in side of the above schematic.
For details of sending MIDI on the PIC, see the PicBasic Pro MIDI notes. For details on the BX-24, see the BX-24 MIDI notes. For details on Arduino, see the Arduino MIDI lab.
4 Replies to “MIDI”
Comments are closed.