Arduino Ethernet (and WiFi) and Your Favorite Band

Let’s say you’re a fan of one of the bands in The Deli magazine’s new bands poll. There are so many good bands there, like Teen Girl Scientist Monthly, and others. And let’s say you were looking for a project for an Arduino WiFi shield or Ethernet shield.  Why not make your Arduino vote for your favorite band? It’s not hard to do.

First you need to know how to scrape the webpage for the URL of the vote. If you view source on the page, you’ll see it nice and clear:

/poll/poll.php?category=6&answer=6560&adZone=7

So the whole URL is

http://nyc.thedelimagazine.com/poll/poll.php?category=6&answer=6560&adZone=7

Great! Now, take the WiFi WebClient example, or the Ethernet WebClient example, and change a few lines:

Change  this:

client.println("GET /search?q=arduino HTTP/1.1");
client.println("Host:www.google.com");

to this:

client.println("GET /poll/poll.php?category=6&answer=6560&adZone= HTTP/1.1");
 client.println("Host:nyc.thedelimagazine.com");

And change this:

char server[] = "nyc.thedelimagazine.com";

to this:

char server[] = "www.google.com";

And give it a go! Remember, no cheating. You can only vote once per IP address.  But if you know a friend with several WiFi shields or Ethernet shields, well, that’s only one IP address per shield, right?


(Good luck, Matt and the band!)

Sending Tweets from Arduino through Pachube.com

I get a lot of people asking me how to send tweets from an Arduino through an Ethernet or WiFi shield. It turns out to be a bit tricky, because Twitter uses OAuth to manage authentication, which is difficult to program on an Arduino due to its limited program memory size.  Most libraries that send tweets from an Arduino do so by handling the authentication through another site. There are a couple of libraries that attempt to do it directly from the Arduino, but I haven’t seen one I like yet that sticks to the Arduino API style and/or doesn’t take up a lot of memory (though I am ever hopeful someone will write one). Since not everyone knows how to write a server-side middleware program to handle the authentication, I decided to see if I could get an existing service to take care of it for me.

My first thought was to use If This Then That, but I don’t know the details of their API well enough, so I went with something I already knew: Pachube. Yes I know they have a newer name, but due to some complications I’m not sure are resolved, I’m using the old name. Here’s how to do it:

Continue reading “Sending Tweets from Arduino through Pachube.com”

Using REST as a command protocol for web-to-serial applications

Updated 19 Jan 2014

The address you type into your browser’s address bar is often the location of a particular document on a server. For example, http://tigoe.net/index.html refers to an HTML document living in the main directory of my server, tigoe.net. But URLs can be used to represent more than a file address. They can also be used to set or get the state of web-based application. For example, http://www.mystore.com/item/3045/price could be used to tell the application you want the price of item 3045. If you want the set the price, you could use http://www.mystore.com/item/3045/price/4.99. Web frameworks like Sinatra (for Ruby), Flask (for Python) and Express (for JavaScript through node.js) make it possible for you to build a web server that uses Representational State Transfer, or REST, as the control protocol for your application.

REST is a style of formatting URLs such that the URL itself describes the state of the thing it’s addressing. In the store example above, the URL is a representation of the item in the store (http://www.mystore.com/item/3045/price).  To change the state of the item, you use another URL to represent that change (http://www.mystore.com/item/3045/price/4.99).  At its simplest, REST means organizing your web application so that the URLs provide clear, sensible meaning as to what’s going on. For a more detailed explanation, see Understanding REST or Building Web Services the REST way. In this post, you’ll learn how to use a RESTian scheme as a communications protocol between a microcontroller and a web page using node.js and a little client-side JavaScript in the middle.

Continue reading “Using REST as a command protocol for web-to-serial applications”

Serial to JSON in Node.js and Arduino

Node.js is great for making web services, and node-serialport makes it very easy to connect to serial devices on your computer. In my last post, I showed how to connect an Arduino microcontroller application to a web page using Node.  This post expands on that, introducing how to use JavaScript Object Notation (JSON) from Arduino all the way through to your HTML page.

The beauty of node is that it’s JavaScript, so you get to use everything Javacript gives you, including its wonderful lightweight data format, JSON, or JavaScript Object Notation. JSON describes data objects using arrays of key-value pairs separated by colons. If you want to add more properties to an object, just add another array element. the value of an element can be a JSON object itself. When you’ve got an application that uses JavaScript on the server side and on the client side, it makes sense to use JSON to describe your data all the way through, so you can just pass it around without a lot of conversion.

Arduino doesn’t speak JSON natively. There are a couple JSON parser libraries out there for Arduino, but I haven’t seen one that I like yet. All of the ones I’ve seen expect more pointer knowledge from the user than I’d like.  So for this example you’ll assemble your own JSON string using Arduino’s String class, and letting node.js turn it into a JSON object.

To make this happen you’ll need:

This post assumes you understand:

  • How to use Arduino, including how to send serial data
  • How to write a web page, and what a server is
  • A little about JavaScript
  • A little about the command line
  • Beginning experience with node.js.  For my brief intro, see this post.

Continue reading “Serial to JSON in Node.js and Arduino”

Serial to Browser using node.js

Updated 28 July 2015

This is a brief introduction to using node.js and websockets to connect a serial device, like an Arduino microcontroller, to a browser.

To make this happen you’ll need:

This post assumes you understand:

Datalogging with Arduino

There are several ways to save data from a sensor attached to an Arduino. If you’re connected to a personal computer, you can simply send the data from the Arduino to the personal computer serially, and save it to a file. If you’ve got an SD card attached to the microcontroller, you can save the data to the card. Or, if you have access to the internet and a device that can connect to a server, you can save the data to a server. In the tutorial below, you’ll read a DHT11 temperature and humidity sensor and log data in three ways:

  • Serial transmission to a personal computer, and serial capture to a file.
  • Saving data to an SD card mounted on the Arduino
  • HTTP upload to xively.com (formerly pachube.com) via an Ethernet shield or Ethernet Arduino.

Hardware you need:

  • personal computer
  • Ethernet Arduino and USB-to-serial connector, or Arduino Uno and Ethernet shield (or equivalents)
  • SD Micro card
  • DHT11 temperature and humidity sensor
  • 10-kilohm resistor

Software you need:

Concepts you should know:

  • Basic understanding of Arduino code
  • Basic electrical concepts
  • Serial communication concepts
  • How to install libraries in Arduino
  • HTTP request concepts

For more on the DHT sensors, see Adafruit’s tutorial.

To get started, install the Arduino IDE and download the DHT library. Unzip the library and change the directory name to DHT, then copy it to the libraries/ directory of your Arduino sketch directory. If this is your first time using Arduino, the default location is in your user directory, called Arduino/ . You might have to create the libraries directory inside the sketch directory. Then download the example sketches from my gitHub repository, unzip them and save them to your sketch directory as well. Then start the Arduino IDE.

Connecting the sensor

Connect the DHT11 sensor to the Arduino as follows:

  • Vcc (pin 1) – Digital pin 8
  • Output (pin 2) – Digital pin 7
  • Ground (pin 4) – Digital pin 5

Since the DHT11 sensor uses very little current, you can use the output pins of the microcontoller to power the sensor, using pins 5 and 8. Then attach the output pin of the sensor to pin 7. The output pin will also need a pullup resistor so that it goes high when no data is transmitted. To do this, connect the 10-kilohm resistor from pin 8 to pin 7, or to the +5V pin.

Serial Data Capture to a Graph

The simplest way to get data off the sensor is to print the results out serially and capture them directly on your computer. To make this happen, you’ll need your Arduino attached via a USB-to-serial connection. The sketch SerialTempHumidityReader uses the Adafruit DHT library to read the sensor and sends the results back to the computer serially. Download it and copy it into a new window in the Arduino IDE.

To upload the sketch to your board, connect the board to the computer via USB-to-serial, and look for the board type in the Tools > Board menu. Assuming you’re using an Arduino Ethernet, choose that:

To find your serial port, check the Tools >Serial Port menu with the USB-to-serial adapter NOT connected. Then plug the adapter into your computer again and check the menu again.  The new port that shows up is your USB-to-serial adapter’s port.

Once you’ve selected the board type and the port, upload the sketch by clicking the upload button in the toolbar, or ctrl-U:

When you’ve got the sketch loaded, open the serial monitor by clicking the Serial Monitor button on the right hand side of the toolbar.

You should see readings like this:

The sketch is outputting tab-separated data, and prints out column headers at the beginning.

When you’ve got several readings, click in the serial monitor window, select all (ctrl-A), and copy (ctrl-C). Then open a blank spreadsheet in OpenOffice and paste the results into the sheet. When the Text Import dialog comes up, make sure you click Separated by Tab in the Separator options:

Select the two columns of numbers, and click the graph icon. In the Graph dialog box, choose Line type, the Lines Only option, then click Finish. Your graph will be inserted in your spreadsheet. Voila, graphing made simple!

Serial Data Capture to a File

If you have a serial terminal program like CoolTerm on your computer, you can also capture to a file. To do so, open CoolTerm, and choose your serial port in the Options menu. Click the Connect icon, then from the Connection Menu, choose Capture to TextFile… and Start. Give your file a name and save.

Note: if you want the file to start from the beginning of your sketch, hold down the reset until you’ve started capture.

To stop capture, choose Connect > Capture to TextFile… > Stop. Then you can use your file in any application you want. Change the file extension to .csv and you can open it in a spreadsheet and graph as above.

Saving Data to an SD Card

Sometimes you want to save data when you’re not connected to a personal computer. Attaching an SD card to an Arduino is fairly straightforward. There are several different shields that have SD cards on board, and the Arduino Ethernet has an SD card right on the main board. The SD card library makes it simple to save files to your SD card.

Format a microSD card as FAT16 or FAT32 on your personal computer, and load it onto your Arduino. Then upload the SDCardDataLogger sketch. This sketch reads the sensor using the Adafuit DHT library, and if there is an SD card present and initialized, it saves the results to a file called “DATALOG.CSV”. Transfer this file to your computer and use it as you wish. You can open it in a spreadsheet and graph it as you did above, or anything else you wish.

Posting data to Xively.com

If your Arduino is connected to the internet via Ethernet, you can connect to pachube.com and program it to post data there. Then you can use Pachube’s data storage and graphing tools to save and visualize your data.

Set up a xively.com account. Click Create a Feed. Give it a name, add any descriptive tags you want, and add a location if you wish. Add two datastreams called rH (relative humidity) and temp (temperature) as follows:

Write down the feed number and fill it into the feed variable in the sketch (PachubeDataLogger). You’ll also need your API key, which is a long string that identifies you to pachube.com. Click My Keys from the pachube menu to get your key. Copy it into the apiKey variable in the sketch below.

Upload this sketch to your Arduino, and connect the board to the net via Ethernet. Open the serial monitor. When the sketch starts, it will look for an IP address using DHCP. Then every ten seconds, it will read the sensor and try to upload to Pachube. A successful upload will print out something like this:

192.168.2.6
rH,26.00
temp,30.00
connecting...
data uploaded
HTTP/1.1 200 OK
Date: Sat, 16 Feb 2012 10:03:14 GMT
Content-Type: text/plain; charset=utf-8
Connection: close
X-Pachube-Logging-Key: logging.G5DkQtnxEdwyKbk0KSKI
X-PachubeRequestId: 0b4efe30282b715276cf1f849f7123ed3eaba234
Cache-Control: max-age=0
Content-Length: 1
Age: 0
Vary: Accept-Encoding

When you look at your feed, you’ll see a graph of your temperature and humidity.

Now you’ve got several methods to log data from an Arduino. You can change the sensor to any sensor you wish, and revise the sketches shown here to read that sensor instead of the DHT11. Enjoy!

Update

I’ve added code to the repository for this tutorial that shows how to use the Pachube code with a BMP085 barometric pressure sensor. Thanks to Adafruit for the excellent library for this sensor.  I’ve also added an example showing how to use the BMP085 with the SD card, and with a Realtime Clock. Again, Adafruit’s library for the RTC makes this easy.

Update 2

Pachube became xively.com, and then they became part of the Google IoT Cloud platform, so I can’t vouch for the validity of any of the pachube examples on this page now. They may work, if xively/Google didn’t change the API.


Networked Bed Presence sensor

John Schimmel and I had a meeting with a friend the other day who has chronic condition, and is looking for tools to notify her family and friends of her activity at home, so she can live more independently. A lot of good ideas came up, making for a potentially exciting project that’d be useful someone we care about: a win-win situation.

One of the ideas she had was a bed sensor, which would let her family know whether she’s in bed or not, so they can call to either wake her up, or tell her to get some rest if she’s up too late. Inspired by Mustafa Bagdatli and Diego Rioja’s BedData project, and assisted by them, we thought we’d see if we could put something together quickly, connecting force sensing resistors to an Arduino and using an Ethernet shield to upload data to Pachube.  The project has not been tested in the field yet, but it’s working in the lab, and was simple to set up.  It may be a useful example for other sensor projects.

Continue reading “Networked Bed Presence sensor”

Serial ports on an iPhone?

hc gilje posted some useful notes on accessing the serial ports of an iPhone. Bottom line:

Apple has not made it easy to let the iphone communicate with external devices. Basically, you need a jailbroken phone to do anything.

That said, his notes are useful for anyone who’s really really got to get at the serial port.

Other ways of getting sensors into the iPhone include Tellart’s NADAMobile, which uses the microphone input as an analog input, and Brian Jepson’s PhoneGap solution, which uses ethernet and an ethernet shield.

Using PepperMill to turn a motor into a sensor

Nicolas Villar sent me a sample of the
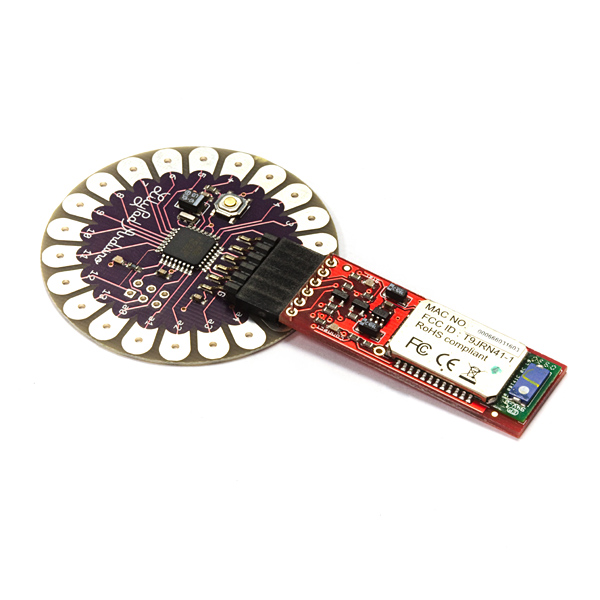
 PepperMill, a new sensor board he and Steve Hodges designed at Microsoft Research in Cambridge, UK.  It’s a nifty little board.  You attach a DC motor and the board can an output voltage when the motor is turned,  and analog signals telling you the direction and speed of the motor.  It turns a DC motor into a rotary encoder, of sorts.

Continue reading “Using PepperMill to turn a motor into a sensor”